How To Sieve Rocks From The Garden: Easy Guide
The easiest way to sieve rocks from a garden is to place dry or slightly damp soil on a strong garden screen, shake it over a tarp or wheelbarrow, and remove the stones left on top. Use a wide screen for large beds and a finer screen for seed beds or potting soil.
This method works well for raised beds, vegetable gardens, lawn repair, and new planting areas across the United States. It can save time compared with picking out each rock by hand, especially when a garden bed contains many small stones.

What You Need Before You Start
Gather the right tools before you move the soil. A basic setup needs a soil sieve, a shovel, a tarp or wheelbarrow, gloves, and a bucket for the rocks.
Basic tools and materials
- Garden soil sieve or soil screen
- Sturdy garden fork or shovel
- Wheelbarrow, tarp, or large plastic tub
- Work gloves
- Safety glasses
- Bucket or pile for removed rocks
- Water source for very dry soil
- Replacement soil, compost, or mulch if needed
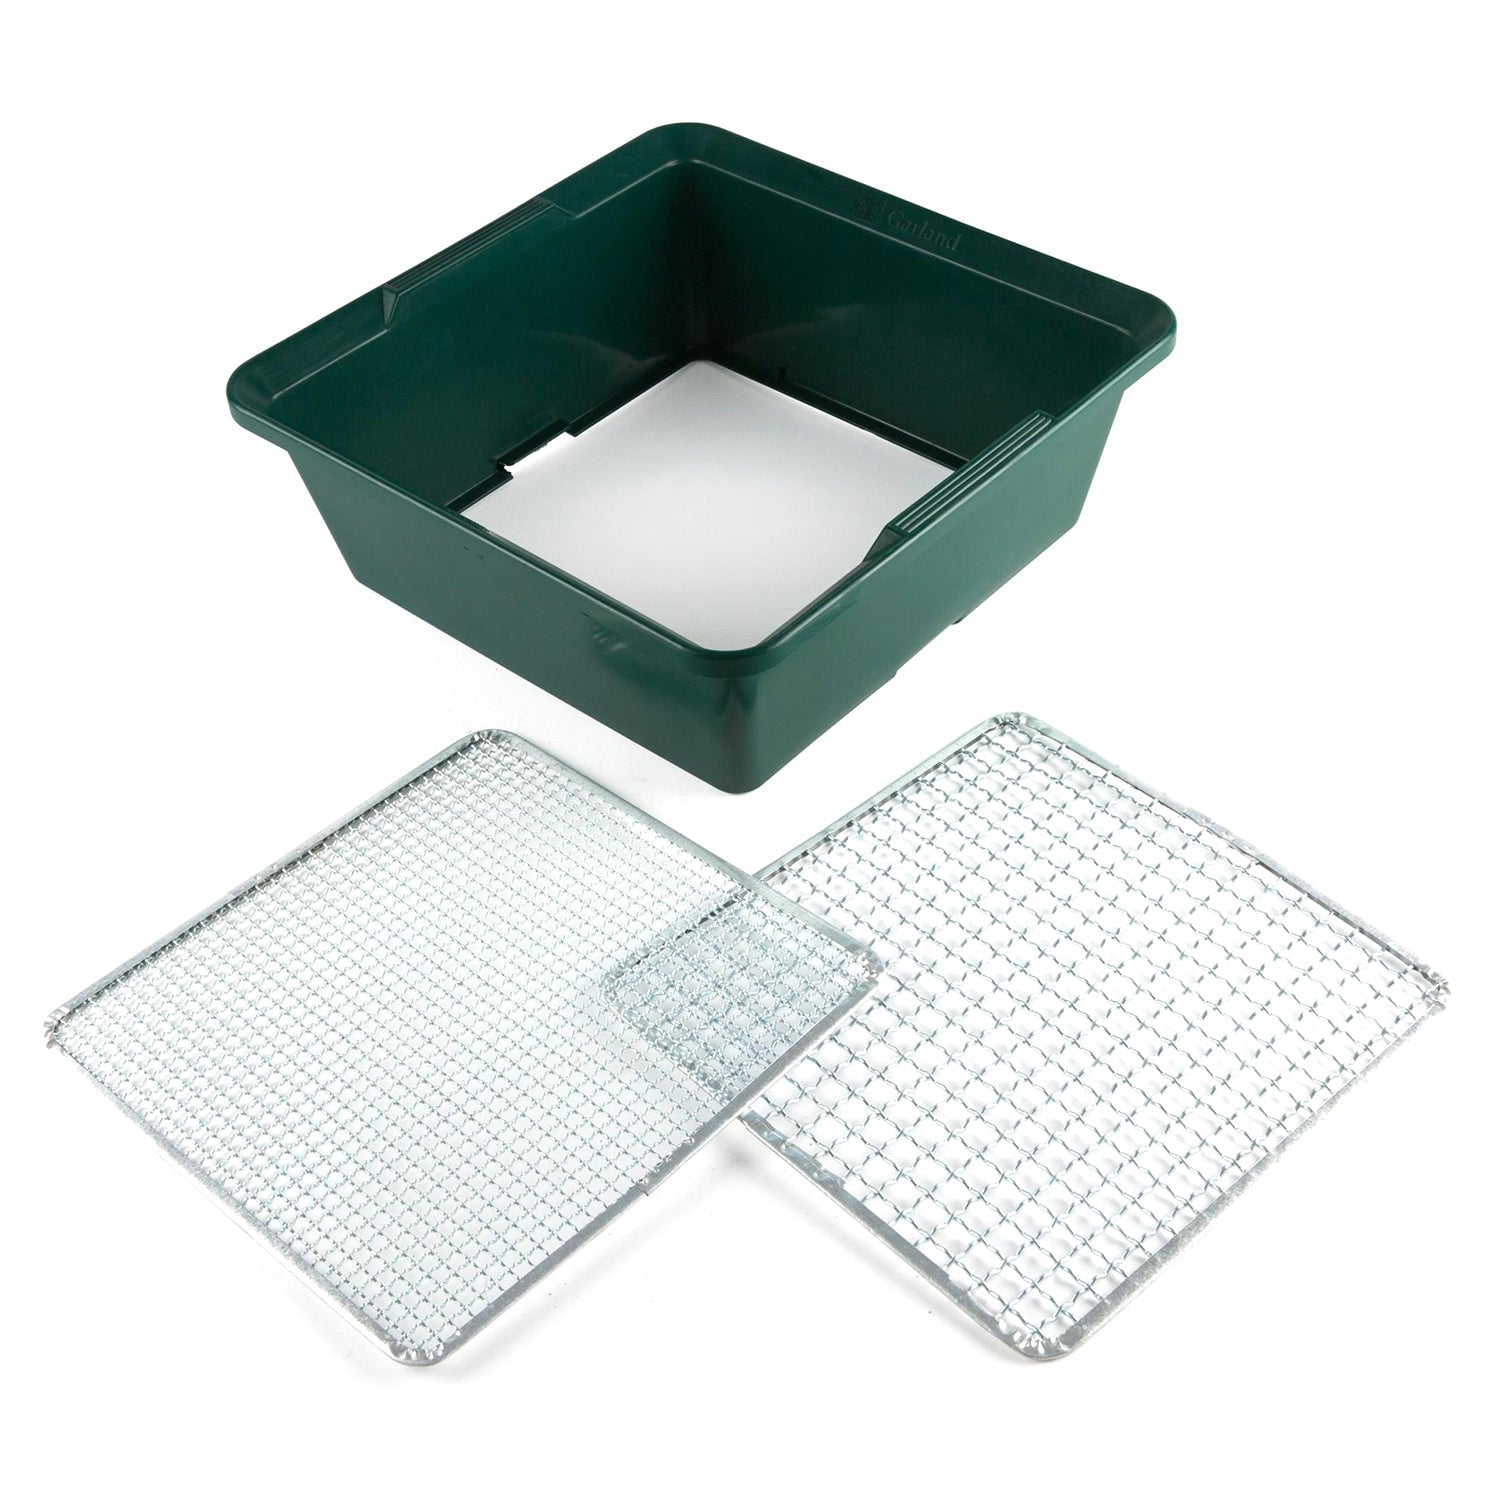
A garden sieve is also called a soil screen or soil sifter. It has a frame with a mesh surface. Fine soil falls through the mesh, while rocks, roots, sticks, and large clods stay on top.
Do not use a kitchen strainer for garden soil. It is usually too small and may bend under the weight of soil and stones.
Choose the right screen size
The best mesh size depends on the job. A large mesh removes only bigger rocks. A smaller mesh creates smoother soil but takes more time.
| Garden task | Useful screen opening | What it removes |
|---|---|---|
| Removing large stones | About 1/2 to 1 inch | Large rocks, roots, sticks, hard clods |
| General bed preparation | About 1/4 to 1/2 inch | Medium stones and most plant debris |
| Seed beds and fine planting mix | About 1/8 to 1/4 inch | Small stones and coarse debris |
| Compost screening | About 1/4 inch | Twigs, clumps, and unfinished material |
These are practical starting points, not strict rules. A screen with smaller openings will produce finer soil, but it will also clog more easily and require more shaking.
For most home gardens, a screen with openings around 1/4 inch to 1/2 inch gives a good balance between speed and soil quality.

How to Sieve Rocks From Garden Soil
Follow these steps to screen garden soil with less effort and less mess.
1. Mark the work area
Choose a flat spot near the garden. Place a tarp under the screen if you want to return the screened soil to the bed.
A tarp also makes it easy to collect spilled soil. If you use a wheelbarrow, set the screen across the top so the screened soil falls into the tray.
Before digging, check for buried irrigation lines, landscape lighting, utility lines, and other objects. In the United States, contact 811 before digging where required by your state or utility provider.
2. Test the soil moisture
Soil should be crumbly, not wet and sticky. Pick up a handful and squeeze it.
- If it falls apart easily, it is ready.
- If it forms a soft ball that breaks with a light tap, it may still work.
- If it smears or sticks to your glove, let it dry.
- If it is dusty and hard, add a small amount of water and wait.
Very wet soil can plug the screen. Very dry soil may create dust and make hard clods difficult to break.
3. Break up large clods
Use a shovel or garden fork to loosen the soil. Remove very large rocks, roots, branches, and trash before putting soil on the screen.
Do not force solid clods through the mesh with excessive pressure. Break them apart with your hands or the edge of a shovel. Some hard clods are not soil at all; they may contain clay, gravel, or compacted roots.
4. Load a small amount of soil
Place a shallow layer of soil on the screen. A layer about 1 to 2 inches deep is easier to sift than a full shovel load.
Too much soil can cover the mesh and stop fine soil from falling through. Smaller loads may seem slower, but they often finish faster because the screen stays open.
5. Shake or rub the soil across the screen
Hold the screen over the tarp or wheelbarrow and shake it from side to side. You can also move the soil across the mesh with a gloved hand or a small garden trowel.
Use light pressure. The goal is to let the soil pass through, not to grind every piece of material against the screen.
Stop when mostly rocks, roots, and other debris remain on top. Pick out any usable organic material, such as large earthworm-free roots or partly broken-down leaves, if you want to return it to the garden.
6. Sort the material left behind
Separate the leftovers into useful groups:
- Large rocks: Use them for drainage channels, borders, or other landscaping if they are clean and suitable.
- Small stones: Set them aside or remove them from areas where you want a fine seed bed.
- Roots and sticks: Add clean plant material to a compost pile.
- Plastic, glass, metal, or unknown debris: Remove it from the garden and dispose of it safely.
- Hard clay clods: Break them up if possible, but do not assume all clods are rocks.
Wear gloves when sorting. Sharp stones, broken glass, and rusty metal can hide under the soil.
7. Repeat until the bed is clear enough
Return the screened soil to the bed or use it for planting. Keep screening until the soil has the texture needed for the crop or project.
You do not need to remove every stone from all garden soil. Many plants grow well in soil that contains small gravel. Screening is most useful when rocks interfere with seed contact, root growth, transplanting, or the use of a hoe or hand tool.

How to Screen Soil Without a Commercial Sieve
You can make a simple garden soil screen from a wood frame and hardware cloth. This option works well when you need to process a large amount of soil.
Simple DIY soil screen
You will need:
- Four straight pieces of untreated or exterior-rated lumber
- Galvanized hardware cloth
- Exterior screws
- Washers or fencing staples
- Drill or hammer
- Wire cutters
- Work gloves and safety glasses
Build a rectangular frame. Attach the hardware cloth tightly across the bottom. Use washers under the screws or staples so the wire does not pull loose.
A frame around 2 feet by 3 feet is large enough for many home garden jobs but still manageable for one person. A larger frame can process more soil at once, but it may become heavy when loaded.
Check the wire edges after building the screen. Fold or cover sharp ends so they do not cut your hands.
Two ways to support a DIY screen
You can rest the screen across a wheelbarrow or place it over two sturdy supports. Leave enough space below the mesh for screened soil to fall freely.
For a larger project, two people can hold opposite sides and shake the screen. Do not use a frame that is too heavy to control. A dropped screen can injure feet or damage the frame.

Which Soil Should You Screen?
Screening is most useful for some garden tasks and unnecessary for others.
Screen soil for these projects
- Starting small seeds
- Filling trays or small pots
- Preparing a new raised bed
- Removing construction gravel from a planting area
- Making a smooth lawn repair mix
- Blending screened compost with garden soil
- Removing glass, wire, or other unwanted debris
Fine seeds need good contact with the soil. Large stones can leave air gaps around seeds and make it harder to keep the surface evenly moist.
Leave some stones in these areas
- Established beds with mature plants
- Areas planted with deep-rooted shrubs
- Rocky paths and dry garden areas
- Soil used for plants that tolerate gravel
- Large beds where complete screening would disturb many roots
Removing every stone can also remove some natural soil structure. The goal is not to create powder. The goal is to remove material that causes a real problem.

How to Estimate the Work
The amount of soil and the screen size determine how long the job will take.
To estimate soil volume, multiply:
Length × width × depth = cubic feet
For example, a bed that is 8 feet long, 3 feet wide, and 6 inches deep has this volume:
8 × 3 × 0.5 = 12 cubic feet
A full screening job will take longer if:
- The soil contains many rocks.
- The soil is wet or clay-heavy.
- The screen openings are small.
- The bed is deep.
- You must remove roots and trash by hand.
- You are working alone.
Screen a small test batch first. This shows whether the mesh is too fine and whether the soil is dry enough. If the screen clogs at once, let the soil dry or switch to a larger mesh.
What to Do With the Rocks
Clean rocks can have several uses around a home garden.
You can use them for:
- Garden borders
- Stepping paths
- Erosion control
- Dry creek features
- Decorative mulch
- The base of a stable outdoor project, when appropriate
Do not place a thick layer of rocks at the bottom of a container to improve drainage. This common practice can leave a perched water zone above the rock layer instead of improving drainage. Use a container with drainage holes and a suitable growing mix instead.
Avoid using rocks from soil that may contain contaminants for food gardens unless you know their source. Stones can hold soil dust, paint chips, fuel residue, or other debris.

Safety Tips for Screening Garden Soil
Screening soil is simple, but it can expose you to sharp debris, dust, and heavy lifting.
- Wear gloves and safety glasses.
- Wear sturdy shoes with closed toes.
- Keep children away from the work area.
- Lift small loads and bend your knees.
- Do not breathe clouds of dry soil dust.
- Wet dusty soil lightly instead of creating mud.
- Wash your hands before eating or touching your face.
- Keep cuts covered.
- Stop if you find needles, chemical containers, asbestos-like material, or large amounts of broken glass.
If an older urban property has peeling paint, a history of industrial use, or suspected contamination, consider testing the soil before growing food. The U.S. Environmental Protection Agency and many state extension services provide guidance on lead and other soil contaminants.
A soil test can tell you about more than rocks. It may also measure pH, nutrients, organic matter, and selected contaminants. For food gardens, contact your state university Extension service for local soil-testing options.

Common Problems and Fixes
The screen keeps clogging
Likely causes: Wet soil, clay, too much soil, or mesh that is too fine.
Fix: Let the soil dry, use smaller batches, break clods by hand, or switch to a larger screen.
Soil falls through, but small rocks remain
Likely cause: The mesh is too large for the result you want.
Fix: Use a second screen with smaller openings. A two-stage process is often faster than using a very fine screen from the start.
Nothing passes through the screen
Likely causes: The soil is wet, compacted, or full of roots.
Fix: Loosen the soil, remove roots, let it dry, and screen a thin layer.
The screen bends
Likely causes: A weak frame, unsupported mesh, or heavy loads.
Fix: Add a center support, use stronger hardware cloth, or reduce the batch size. Do not continue using a frame with exposed wire or broken fasteners.
The screened soil is too fine
Likely cause: The mesh removed more material than the plants needed.
Fix: Mix some unscreened soil or clean coarse material back in. Most garden plants need well-drained soil with air spaces, not dust-like soil.
The soil has a bad smell
A strong fuel, solvent, sewage, or chemical odor is a reason to stop. Move away from the area and seek local environmental or public health guidance. Do not use the soil for food crops until its safety is known.

Key Takeaways
- Use a garden soil screen, not a kitchen strainer.
- Start with a screen opening of about 1/4 to 1/2 inch for general garden work.
- Screen soil when it is crumbly, not wet and sticky.
- Work in small batches to prevent clogging.
- Remove sharp debris and unknown waste with care.
- You do not need to remove every small stone from an established garden.
- Test suspect soil before growing food in it.
Frequently Asked Questions
Can I sieve wet garden soil?
You can, but wet soil often sticks to the mesh and forms a solid layer. Let it dry until it crumbles in your hand. If the soil is extremely dry and dusty, dampen it lightly before screening.
What size mesh is best for removing rocks from soil?
A 1/4-inch to 1/2-inch opening works for most garden beds. Use about 1/2 inch for fast removal of large stones and about 1/4 inch for seed beds or fine planting mixes.
Should I remove all rocks from my garden soil?
No. Small stones do not always harm plants. Remove rocks when they block roots, disrupt seed beds, damage tools, or make planting difficult. Keeping some natural structure is often better than making the soil extremely fine.
Can I use a compost screen to remove rocks?
Yes. A compost screen can remove stones, sticks, roots, and unfinished compost. Make sure the frame and mesh are strong enough for mineral soil, which is heavier than compost.
Is screened soil safe for growing vegetables?
Screening removes physical debris, but it does not prove that soil is free of lead, pesticides, fuel, or other contaminants. If the property has a known risk history, test the soil through a qualified laboratory or a state Extension program before planting food crops.
What is the fastest way to sieve a large garden bed?
Use a sturdy, wide screen with about 1/2-inch mesh, keep the soil slightly dry, and work in shallow batches. Screen only the depth needed for the project rather than processing the entire bed.
Final Recommendation
For most home gardens, use a sturdy 1/4-inch to 1/2-inch soil screen over a wheelbarrow or tarp. Work with shallow batches of crumbly soil, remove the rocks and debris left on top, and return the screened soil to the bed. Screen only where rocks create a planting or drainage problem; a garden does not need to be completely stone-free to grow well.

Laura Bennett is a gardening writer at MyGardenLabs who creates beginner-friendly guides focused on solving common plant care and gardening problems.