
How To Start A Bonsai From A Cutting: Easy Guide
Start with a healthy young branch, root it in a free-draining mix, and protect it until strong roots form.
Learning how to start a bonsai from a cutting is one of the most rewarding ways to grow a miniature tree. You do not need expensive tools or a mature bonsai. With the right species, clean technique, steady moisture, and patience, a simple branch can become a beautiful bonsai trunk. This guide explains the best time to take cuttings, how to root them, common mistakes, and how to shape the young tree over time.

What Is a Bonsai Cutting?
A bonsai cutting is a piece of stem taken from a healthy parent plant and encouraged to grow its own roots. This method is called propagation by cuttings. The new plant is a genetic copy, or clone, of the parent plant.
Cuttings are useful because they preserve traits such as leaf size, flower color, growth habit, and trunk shape. They also cost little and let you create several young trees from one healthy plant.
However, a cutting is not a finished bonsai. It is only the beginning. The young plant needs years of root growth, trunk thickening, pruning, wiring, and careful repotting before it looks like a mature bonsai.
Which Trees Grow Best From Cuttings?
Some woody plants root very easily. Others are slow or unreliable. If you are learning how to start a bonsai from a cutting, choose a species that responds well to propagation.
Good choices include:
• Chinese elm, which roots readily and grows with energy
• Japanese maple, especially from softwood cuttings, although success can vary
• Willow, which often roots quickly in water or soil
• Ficus, including Ficus microcarpa and Ficus benjamina
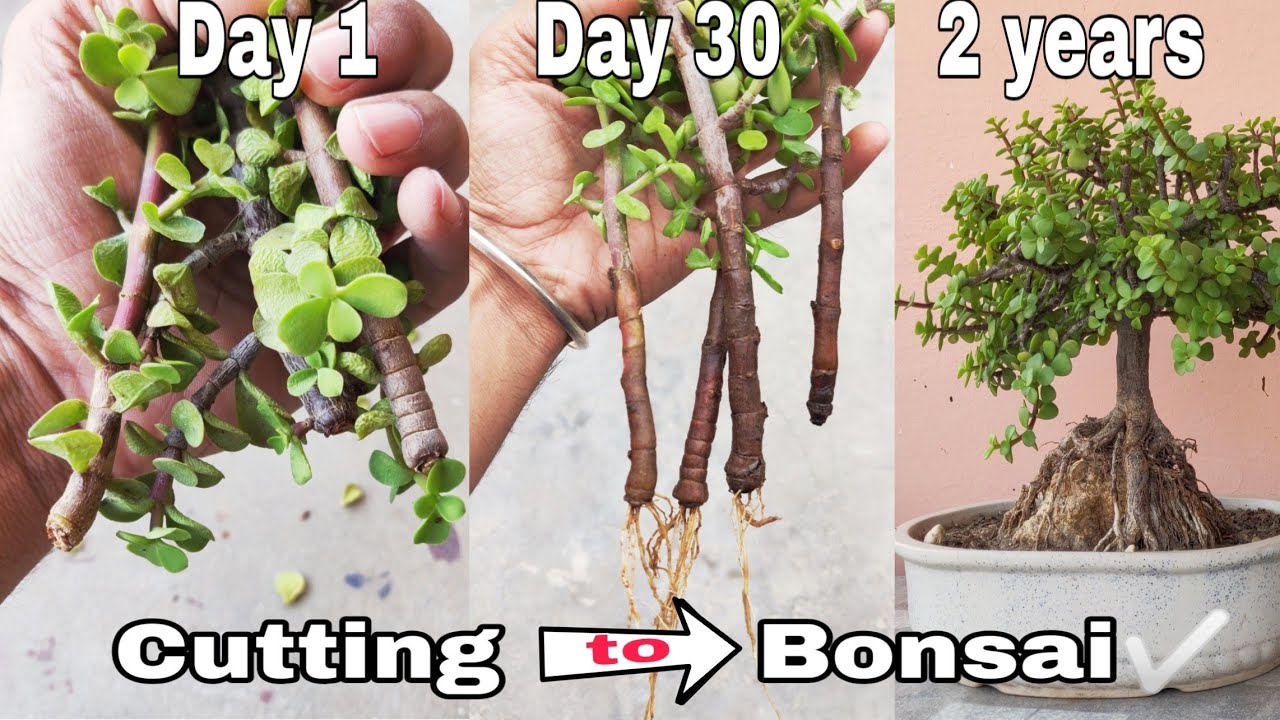
• Jade plant, which roots easily from stem cuttings
• Bougainvillea, which can root well in warm conditions
• Juniper, though it often needs more time and patience
• Privet, boxwood, pomegranate, and many species of hibiscus
Avoid taking cuttings from weak, diseased, or pest-covered plants. A cutting carries the health of its parent. If the parent plant has poor roots, fungal problems, or severe stress, the new plant may struggle from the start.
Species also differ by climate. Tropical trees need warmth and bright light. Temperate trees may need a winter rest. A local botanical garden, bonsai club, or university extension service can help you choose species suited to your area.

When Is the Best Time to Take Bonsai Cuttings?
Timing has a major effect on rooting success. The best season depends on the type of cutting and the tree species.
Softwood cuttings come from fresh growth that is still flexible. They are often taken in late spring or early summer. The stem should bend slightly but not feel soft or limp.
Semi-hardwood cuttings come from growth that has started to mature. They are usually taken in summer or early fall. The stem should feel firm, with some flexibility.
Hardwood cuttings come from mature, dormant branches. They are often taken in late fall or winter. Some trees root well this way, but many species take longer than they do from softwood cuttings.
For most beginners, semi-hardwood cuttings offer a useful balance. They are firm enough to resist collapse but young enough to form roots.
Take cuttings early in the day when the plant is well hydrated. Avoid very hot, dry weather. If the branch loses moisture before planting, its chances of rooting fall quickly.

What You Need to Start a Bonsai From a Cutting
You do not need a large collection of bonsai tools. Clean, simple equipment is enough.
Gather these supplies:
• A healthy parent plant
• Sharp pruning shears or a clean knife
• A small pot or propagation tray
• A free-draining rooting medium
• Rooting hormone, if suitable for the species
• A clear plastic bag or humidity dome
• Clean water
• A plant label
• A spray bottle
Sterilize your cutting tool with rubbing alcohol before and after use. This small step helps reduce the spread of bacteria and fungi.
For the rooting medium, use a mix that holds some moisture but drains quickly. A simple blend may contain equal parts perlite and peat-free potting mix. You can also use coarse sand, pumice, perlite, or fine pine bark.
Do not use heavy garden soil. It can stay wet around the stem and limit oxygen near the developing roots. Root formation needs both moisture and air.
How to Start a Bonsai From a Cutting: Step-by-Step
The following process explains how to start a bonsai from a cutting with a strong focus on cleanliness, moisture control, and root health.
1. Select a Healthy Branch
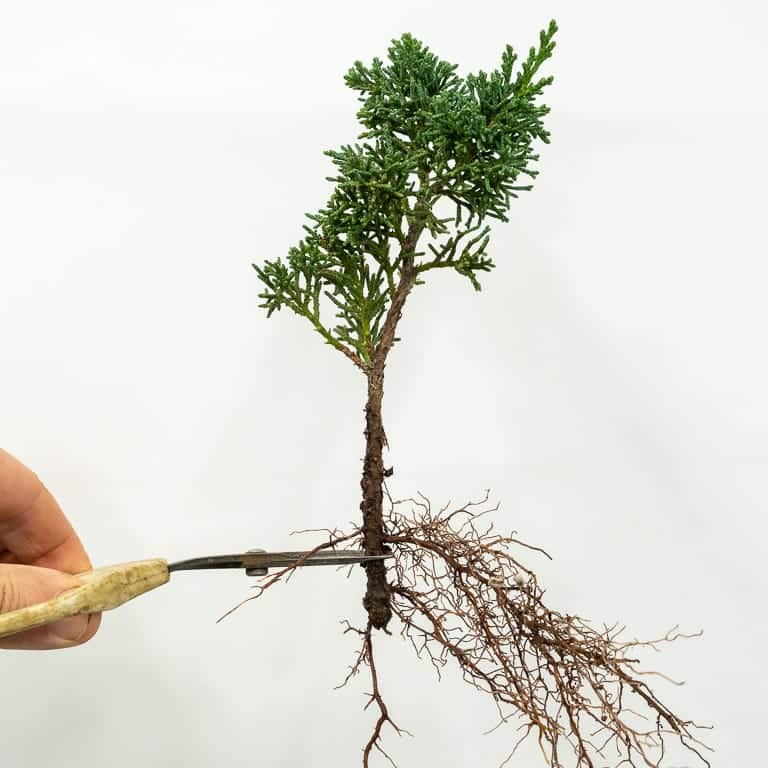
Choose a branch from vigorous, disease-free growth. Look for a stem with several nodes. A node is the point where a leaf or bud joins the stem. New roots often develop near these areas.
A cutting between 4 and 8 inches long works well for many species. The ideal size varies, but very short cuttings may dry out quickly, while very long cuttings may lose too much water.
Avoid branches with flowers or heavy fruit. Flowering uses energy that the cutting needs for root growth.
2. Make the Cutting
Use a sharp, clean tool to make a cut just below a node. A slightly angled cut can help you identify the bottom, but the angle itself does not create roots.
Remove leaves from the lower half of the stem. Keep one or two small leaves near the top. If the leaves are large, cut them in half to reduce water loss.
Do not strip every leaf unless the species requires it. Leaves help produce energy, but too many leaves cause the cutting to dry out before roots form.
3. Apply Rooting Hormone
Dip the lower end in water, then apply a thin layer of rooting hormone. Tap off extra powder. Too much hormone can damage tender tissue rather than help it.
Rooting hormone is not required for every species. Willow and many ficus varieties may root without it. It can be more useful for woody or slower-rooting plants.
Never place a used cutting directly into the hormone container. Pour a small amount into a separate dish to prevent contamination.
4. Plant the Cutting
Make a hole in the rooting medium with a pencil or dibber. Insert the cutting so that at least one node sits below the surface.
Firm the medium gently around the stem. It should hold the cutting upright without crushing it.
Water slowly until the medium is evenly moist. Allow excess water to drain away. A wet pot is not the same as a healthy pot.
5. Create Humid Conditions
Cover the pot with a clear plastic bag or place it inside a humidity dome. Keep the cover from touching the leaves. A few sticks can support the plastic.
Humidity slows water loss while roots develop. Open the cover briefly each day to allow fresh air inside. Constantly trapped, stale air can encourage mold.
Place the cutting in bright, indirect light. Strong direct sun can heat the covered pot and cook the stem. Very low light, however, can weaken the cutting.
6. Maintain Steady Moisture
Check the medium every day or two. It should feel lightly moist, not soaked. If the surface feels dry, water gently.
Do not rely only on misting. Misting raises surface humidity but may not wet the rooting zone. The roots need moisture around the buried nodes.
Remove fallen leaves at once. Dead plant material can attract fungus and pests.
7. Wait for Root Development
Rooting may take a few weeks or several months. Willow may root quickly, while juniper and some hardwood species can take much longer.
Avoid pulling on the cutting to check for roots. This can tear delicate new roots. Instead, look for fresh leaf growth, resistance when the stem is moved gently, or visible roots near a drainage hole.
New leaves do not always prove that roots have formed. Some cuttings use stored energy to produce temporary growth. Confirm root development before moving the plant to a larger pot.
8. Harden Off the New Plant
Once roots form, remove the humidity cover for short periods each day. Gradually increase the time without cover over one to two weeks.
A sudden move from high humidity to dry air can cause leaf drop and stem stress. Think of hardening off as teaching the plant to live in the real world.
Keep the young tree protected from strong wind, harsh afternoon sun, and freezing temperatures during this stage.
The Best Soil for Rooting Bonsai Cuttings
The best rooting medium is airy, clean, and well drained. It should support the stem while allowing water and oxygen to move through the pot.
A practical beginner mix is:
• One part perlite
• One part coarse sand or pumice
• One part peat-free seed-starting mix or fine pine bark
For tropical species, you can use more moisture-retaining material. For succulents such as jade, use a grittier mix with extra pumice or perlite.
The pot must have drainage holes. A small container is often better than a large one because excess soil in a large pot stays wet for too long.
Do not add fertilizer while the cutting is still forming roots. Fertilizer salts can burn tender tissue. Begin light feeding only after the plant has rooted and shows steady new growth.

Light, Temperature, and Water Requirements
Most cuttings root best with bright, filtered light. A north or east-facing window may work indoors. Outdoors, use a shaded bench or an area protected by a light cloth.
Temperature affects root formation. Many warm-climate species root best between 65 and 80 degrees Fahrenheit. Temperate species may prefer cooler conditions, especially during their natural growing season.
Water when the top of the medium begins to dry. Do not keep the pot constantly saturated. Poor drainage can cause stem rot before roots have a chance to form.
If you use tap water, let it reach room temperature before watering. Very cold water can shock tender cuttings, though stable moisture and good drainage matter more than minor water temperature changes.

When to Transplant a Rooted Cutting
Transplant a rooted cutting only when it has a useful root system. A few thin roots may not be strong enough to handle disturbance.
Signs that the cutting is ready include:
• New growth continues for several weeks
• The stem stays firm when moved gently
• Roots appear near the drainage holes
• The root ball holds together when removed from the pot
Move the plant into a slightly larger container. Do not jump from a tiny rooting pot to a large training box. The new container should give the roots room to expand without holding excess moisture.
Use a well-draining bonsai soil appropriate for the species. A mix with akadama, pumice, lava rock, pine bark, or similar materials can provide structure and airflow.
After transplanting, place the tree in bright shade for several days. Avoid heavy pruning or wiring until it has recovered.

How to Train a Bonsai Started From a Cutting
The first goal is not a perfect miniature tree. The first goal is a healthy root system and a thicker trunk.
Let the young tree grow freely when you want trunk development. A trunk becomes thicker as the plant adds wood. Frequent pruning keeps a tree small but can slow trunk thickening.
Use a sacrifice branch when appropriate. This is a long branch that grows freely to add energy and thickness to part of the trunk. Later, you remove it carefully.
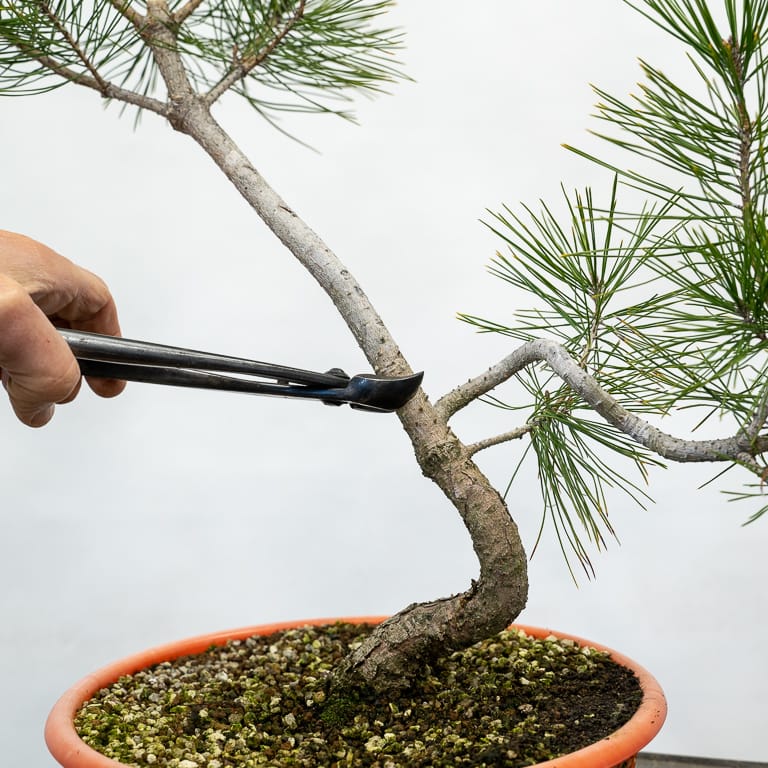
Once the trunk has the size you want, begin structural pruning. Select the main branches, remove unwanted shoots, and guide the shape with gentle wiring.
A cutting often starts with a thin, straight stem. That is normal. Movement can be added later through pruning and wiring. Trying to force a tiny cutting into an old-looking bonsai too soon is one of the most common beginner mistakes.
Common Mistakes When Rooting Bonsai Cuttings
Understanding failure helps you improve. Even experienced growers lose cuttings, especially with difficult species.
Overwatering
Wet soil removes oxygen from the root zone. The base of the cutting may turn dark, soft, or foul-smelling.
Use a porous medium and a pot with drainage holes. Moist is good. Muddy is not.
Using a Weak Cutting
A branch from a stressed or diseased plant may lack the energy to root. Start with healthy growth and avoid damaged stems.
Taking Cuttings at the Wrong Time
A dormant hardwood cutting may fail if the species roots better from young growth. Research the specific tree before cutting.
Giving Too Much Sun
A cutting without roots cannot replace water as quickly as a rooted plant. Strong sun can cause rapid wilting.
Checking for Roots Too Often
Pulling up a cutting interrupts root formation. Trust the process and watch for indirect signs of growth.
Feeding Too Early
Fertilizer does not create roots. It can burn the stem or damage fragile root tissue. Wait until the cutting is established.
Expecting Fast Bonsai Results
Rooting may take weeks, but bonsai development takes years. Patience is not a side skill here. It is part of the method.
A Practical Example: Starting a Ficus Bonsai From a Cutting
Ficus is a good choice for beginners in warm climates or for indoor growing with strong light. Select a healthy branch about 6 inches long and remove the lower leaves.
Place the cutting in a moist mix of perlite and peat-free potting medium. Keep it warm, bright, and humid. Ficus cuttings often root faster than many conifers, but exact timing depends on temperature, light, and plant health.
Once the cutting shows steady new growth and resists a gentle tug, reduce humidity slowly. After the root ball is stable, move it into a small training pot.
Keep the plant away from cold drafts. Ficus trees may drop leaves after a sudden change in light or temperature, but stable care often helps them recover.
A Practical Example: Starting a Juniper Bonsai From a Cutting
Juniper can make an excellent bonsai, but it is less forgiving than ficus. Choose a young, healthy side shoot and use a very free-draining mix.
Keep the cutting in bright shade with good airflow. High humidity can help, but stagnant air may increase fungal problems. Juniper cuttings can take months to root, so patience is essential.
Do not keep juniper indoors for long periods. Most junipers need outdoor light, seasonal changes, and strong air movement to remain healthy.
This example shows why species knowledge matters. The general process for how to start a bonsai from a cutting stays similar, but light, temperature, and timing must match the tree.
Cuttings Versus Seeds and Air Layering
Cuttings are not the only way to create a bonsai. Each propagation method has benefits and limits.
Cuttings
Cuttings create genetic copies of the parent plant. They are inexpensive and can produce a trunk with useful movement if you select the branch well.
The main limitation is that some species root poorly. Cuttings may also begin with a thin trunk.
Seeds
Seeds offer strong root systems and a complete natural life cycle. They are useful when you want many trees or wish to enjoy every stage of growth.
Seed-grown trees vary genetically. They also take longer to develop known traits.
Air Layering
Air layering encourages roots to form on a branch while it remains attached to the parent tree. This method can create a thicker trunk sooner than a small cutting.
It requires more skill and a mature branch. The new roots may also need careful support after separation.
For many beginners, cuttings offer the simplest starting point. They allow you to practice moisture control, root care, pruning, and long-term bonsai design without a large investment.
How Long Does It Take to Start a Bonsai From a Cutting?
The cutting may root in three weeks, three months, or longer. Species, season, temperature, humidity, cutting type, and plant health all affect the result.
A rooted cutting may still need several years before it has a convincing bonsai trunk. Fast-growing species can develop more quickly, while conifers and slow-growing trees may take much longer.
My most useful lesson with young trees has been to judge progress by health, not size. A cutting that grows slowly but builds strong roots is often in a better position than one that produces weak, stretched shoots.
Keep notes about the date, species, cutting type, soil mix, and care. This simple record can show which methods work best in your climate.
Frequently Asked Questions About How to Start a Bonsai From a Cutting
Can any tree become a bonsai from a cutting?
Not every tree roots well from cuttings, but many woody plants can become bonsai this way. Ficus, Chinese elm, willow, privet, jade, and some maples are common choices.
Should I root a bonsai cutting in water?
Some plants root in water, but soil or a porous rooting medium is often safer for long-term development. Water roots may struggle when moved into soil, so transfer the cutting carefully after roots appear.
Do bonsai cuttings need rooting hormone?
No. Many species root without it, while others may benefit from a suitable rooting hormone. Use only a small amount and follow the product label.
How often should I water a bonsai cutting?
Check the rooting medium every day or two and water when the surface begins to dry. Keep it lightly moist, but never leave the pot sitting in water.
Can I take bonsai cuttings in winter?
You can take hardwood cuttings from some dormant trees in winter. However, many species root better from softwood or semi-hardwood cuttings during the growing season.
When can I put a rooted cutting in bonsai soil?
Wait until the cutting has a stable root system and several weeks of healthy growth. Move it into a small training pot first, then begin bonsai styling after it recovers.
Why did my bonsai cutting turn black?
A black, soft base often signals rot caused by excess moisture, poor drainage, contaminated tools, or low airflow. Remove damaged tissue if possible and replant the healthy portion in fresh, porous medium.
Conclusion
Knowing how to start a bonsai from a cutting gives you a simple and affordable way to grow a tree from the beginning. Choose a healthy branch, take it at the right time, use a clean and airy rooting medium, and provide bright indirect light with steady moisture.
Do not rush the styling stage. Strong roots come first, then trunk growth, branch selection, pruning, and wiring. Start with an easy species such as ficus, Chinese elm, willow, or jade, and keep notes as your cutting develops.
Choose a healthy branch this season and give it a careful start. Share your species, rooting method, and progress with fellow bonsai growers so you can learn from each other.

Laura Bennett is a gardening writer at MyGardenLabs who creates beginner-friendly guides focused on solving common plant care and gardening problems.