How To Plant Bulbs Using A Bulb Planter: Easy Guide
Use a bulb planter to make clean holes, set each bulb at the right depth, and cover it with loose soil.
Learning how to plant bulbs using a bulb planter makes fall gardening faster, neater, and more reliable. After years of planting tulips, daffodils, crocuses, and alliums, I have found that the tool works best when matched with the right soil, depth, and planting method. This guide explains each step, common mistakes, and simple ways to help your bulbs grow strong roots before spring.
What Is a Bulb Planter?
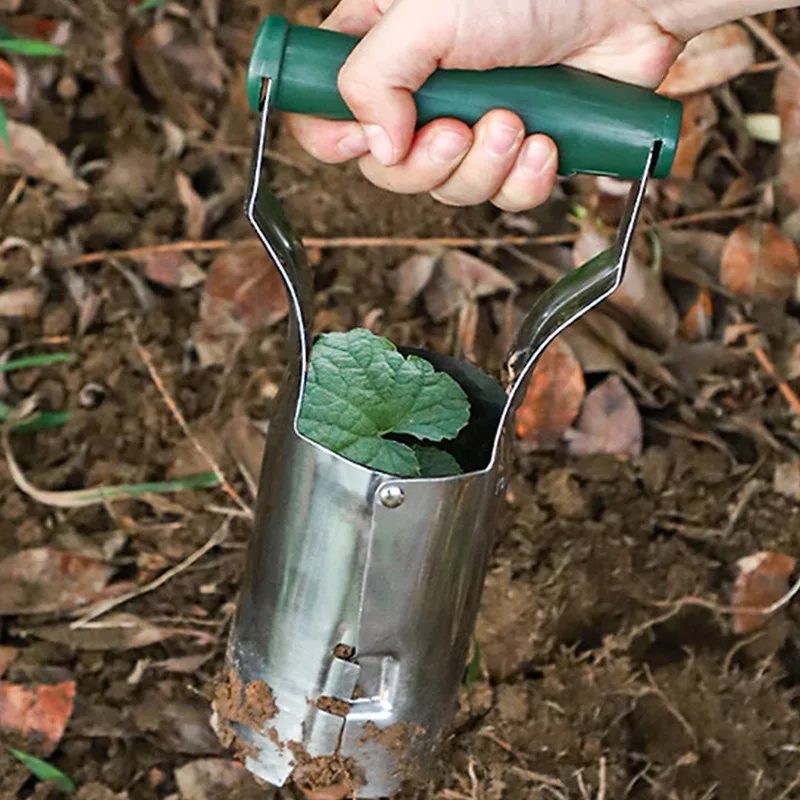
A bulb planter is a hand tool that removes a small plug of soil. It creates a round planting hole for flower bulbs such as tulips, daffodils, hyacinths, crocuses, and ornamental onions.
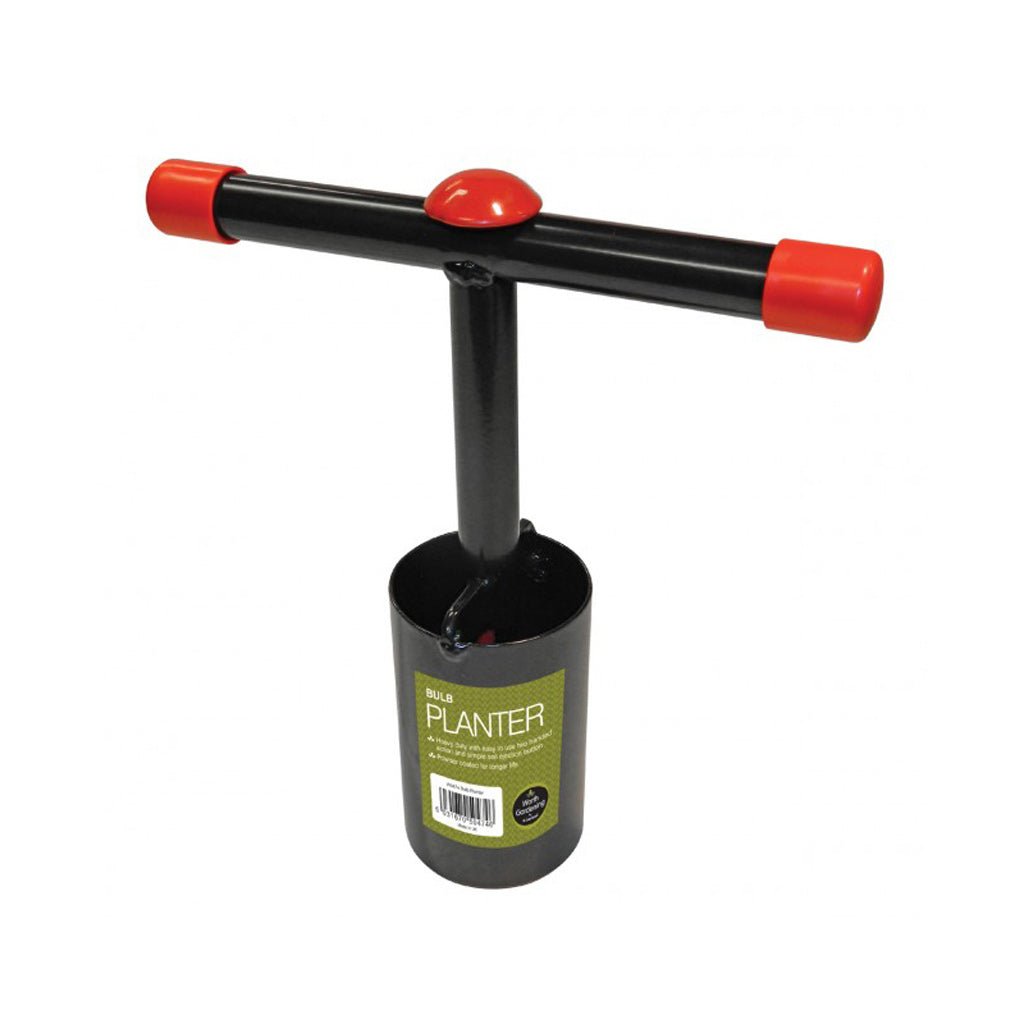
Most bulb planters have a metal cup with a sharp edge. Some models include depth marks, a spring handle, or a long shaft for easier use while standing. Small hand planters work well in loose garden soil, while long-handled models suit large beds or gardeners with back and knee concerns.
The tool is useful because it creates holes with a similar width and depth. This helps bulbs sit evenly in the soil, which can produce a more balanced display when plants bloom.
A bulb planter is not ideal for every garden. It may struggle in hard clay, rocky soil, very dry ground, or beds filled with thick roots. In those conditions, a trowel or garden auger may work better.

When to Plant Flower Bulbs
The best planting time depends on the bulb type and your climate. Spring-flowering bulbs usually go into the ground in fall, while summer-flowering bulbs are often planted in spring after the danger of frost has passed.
Plant fall bulbs when the soil is cool but still workable. In many parts of the United States, this means September through November. The goal is to give bulbs time to grow roots before the ground freezes.
Plant summer bulbs such as gladiolus, dahlias, and begonias after the soil warms. Tender bulbs can suffer from cold soil and frost, so early planting may cause rot or poor growth.
Use these general timing guidelines:
• Tulips, daffodils, crocuses, and hyacinths: Plant in fall.
• Alliums and ornamental onions: Plant in fall.
• Lilies: Plant in spring or fall, depending on the variety and local climate.
• Gladiolus and caladiums: Plant in spring after frost.
• Dahlias: Plant in spring when the soil is warm.
Check the planting directions on the bulb package. Local frost dates, soil temperature, and bulb hardiness can change the best schedule.
Choose the Right Bulb Planter
Learning how to plant bulbs using a bulb planter starts with choosing a tool that suits your body and soil. A good planter should feel stable in your hand and have a sharp, sturdy cutting edge.
A short-handled bulb planter gives you precise control. It is a good choice for containers, small beds, and soft soil. A long-handled planter lets you work while standing, which can reduce strain during large planting jobs.
Look for these features:
• A strong stainless steel or carbon steel cup.
• Clear depth markings.
• A comfortable handle with a firm grip.
• A sharp rim that cuts through soil cleanly.
• A spring-release feature if you want to remove soil plugs with less effort.
Match the planter diameter to the bulb. A tool that is too narrow may crush or squeeze the bulb. A very wide tool removes more soil than needed and can disturb nearby roots.
Before planting, test the tool in a small area. If it bends, sticks, or leaves a ragged hole, the soil may be too hard or the tool may be poorly suited to the site.
Prepare the Soil Before Planting
Good soil preparation is one of the most important parts of learning how to plant bulbs using a bulb planter. A bulb may look simple, but it needs air, water, and space around its roots.
Choose a site with the light required by the bulb. Many spring bulbs prefer full sun, although some, such as certain crocuses and daffodils, can grow in light shade. Avoid places where water remains after rain.
Prepare the bed with these steps:
-
Remove weeds, grass, stones, and old plant debris.
-
Loosen the top 8 to 12 inches of soil with a garden fork if the ground is compacted.
-
Add compost if the soil is poor or lacks organic matter.
-
Mix heavy clay with organic matter to improve drainage.
-
Avoid adding fresh manure, which can damage bulbs and encourage excess leaf growth.
Do not work wet clay soil. Walking on it can press the soil into dense clumps. If soil sticks to your boots or tools, wait a few days and try again.
A simple drainage test helps. Dig a hole about 12 inches deep, fill it with water, and watch how fast it drains. If water remains for many hours, choose a better site or improve drainage before planting.

How to Plant Bulbs Using a Bulb Planter
The basic method is simple, but small details matter. Take your time with the first few holes, then use them as a guide for the rest of the bed.
1. Check the bulb
Choose firm bulbs with dry outer skins. Avoid bulbs that feel soft, smell bad, or show deep mold. A small amount of loose papery skin is normal.
Place the bulb with its pointed end facing up. The flatter root plate should face down. Some bulbs are less obvious, but the roots or root plate usually show the correct direction.
2. Mark the spacing
Read the bulb label for spacing advice. As a general rule, small bulbs need less space than large bulbs.
You can plant bulbs in groups for a natural look. Odd-numbered groups of five, seven, or nine often look more relaxed than evenly spaced single bulbs.
3. Press the planter into the soil
Hold the bulb planter straight up. Push it into the soil with steady pressure until the depth mark reaches the soil surface.
Do not twist the tool hard in rocky soil. A twisting motion can make a wide, uneven hole and may damage the planter.
4. Remove the soil plug
Lift the tool straight out. Some planters hold the soil plug inside the cup. Others release it with a spring or allow you to tap it out.
Keep the soil plug nearby. You can use it to cover the bulb after planting.
5. Check the depth
Bulb depth is usually measured from the base of the bulb to the soil surface. As a broad guide, plant most bulbs at a depth about two to three times their height.
For example, a 2-inch-tall bulb may need a hole about 4 to 6 inches deep. Large daffodils may need more depth than small crocuses. Always follow the package instructions when available.
6. Set the bulb in the hole
Place the bulb pointed side up and root side down. If the hole has a hard floor, loosen the bottom slightly with a finger or the tip of a trowel.
Do not press the bulb into hard soil. Roots need a soft path for growth.
7. Replace the soil
Drop the soil plug back into the hole. Press the soil gently so there are no large air pockets, but do not pack it tightly.
The soil should settle around the bulb like a light blanket. Heavy pressure can reduce air space and make root growth harder.
8. Water the area
Water after planting unless the soil is already saturated. Moist soil helps settle the soil around the bulb and starts root development.
Do not keep the bed soaked. Bulbs need moisture, but standing water can cause rot.
This step-by-step approach is the most dependable way to learn how to plant bulbs using a bulb planter without damaging the bulbs or disturbing nearby plants.

How Deep and Far Apart Should Bulbs Be?
Correct depth protects bulbs from temperature changes, drying, and animals. A bulb planted too shallow may heave out of the soil during freezing weather. One planted too deep may struggle to reach the surface.